
Upgrade Oracle Grid Infrastructure:
Note: Oracle Grid Infrastructure 12.2 has added new features that require plenty of disk space in the CRS disk group. Therefore, you must expand the size of the CRS disk group before you can upgrade Oracle Grid to the new release.
Expand the CRS disk group in ASM.
## Shut down srv1 and srv2.
## Add a new fixed-size sharable disk to srv1. Give it the name DISK4 and set its size to 40 GB.

In Oracle VirtualBox, click on srv1 >> click on Settings >> click on Storage in the right pane >> click on Controller: SATA >> click on Add Hardisk >> click on Add a New Disk >> select VDI option >> make it fixed-size >> enter the full-path filename of the disk >> set its size to 40 GB

## Once the disk is created, make it sharable.
File menu item >> Virtual Media Manager >> select the created disk DISK4 >> click on the Modify button >> choose the option to make this file shareable >> press Ok >> press Close
## Link the new disk to srv2.
click on srv2 >> click on Settings >> click on Storage in the right pane >> click on Controller: SATA >> click on Add Hardisk >> click on an Existing Disk button>> navigate to the new disk file and press OK
## Create the directory of the new Oracle Grid home. Make grid the owner of the home directory.
Start srv1 and wait for its OS to load.
## Start Putty and login to srv1 as root user. Format the added disk.
## display all the available disks:
ls -l /dev/sd*
# format the disk:
# answer "n", "p","1", default, default, "w" when prompted
fdisk /dev/sde

## Add the partitioned disk to the ASM recognized disk list.
oracleasm listdisks
oracleasm createdisk DISK4 /dev/sde1
oracleasm listdisks
Start srv2 and wait for its OS to load.
## Start Putty and login to srv2 as root user.
## Scan the ASM disks and make sure DISK4 is seen by srv2.
oracleasm scandisks
oracleasm listdisks
## Login to the VirtualBox window of srv1 as grid.
## Start asmca utility and add DISK4 to the CRS disk group.
Right-click on the CRS disk group >> select Add Disks >> select DISK4 then click on OK button
You should see the CRS disk group size increased to nearly 50GB, as shown in the following screenshot:

## Make sure you have Putty sessions connected to srv1 and srv2 as root.
## Create the directory of the new Oracle Grid home. Make grid the owner of the home directory.
##srv1
mkdir -p /u01/app/12.2.0/grid
chown grid:oinstall /u01/app/12.2.0/grid
##Create the same directory in srv2.
ssh srv2
mkdir -p /u01/app/12.2.0/grid
chown grid:oinstall /u01/app/12.2.0/grid
exit
##In the VirtualBox window of srv1, login as grid user
##Unzip the linuxx64_12201_grid_home.zip file to the new Grid home directory.
unzip linuxx64_12201_grid_home.zip -d /u01/app/12.2.0/grid
##In the terminal windows, change the current directory to the new Oracle Grid directory.
cd /u01/app/12.2.0/grid
export ORACLE_HOME=/u01/app/12.2.0/grid
./gridSetup.sh
 |

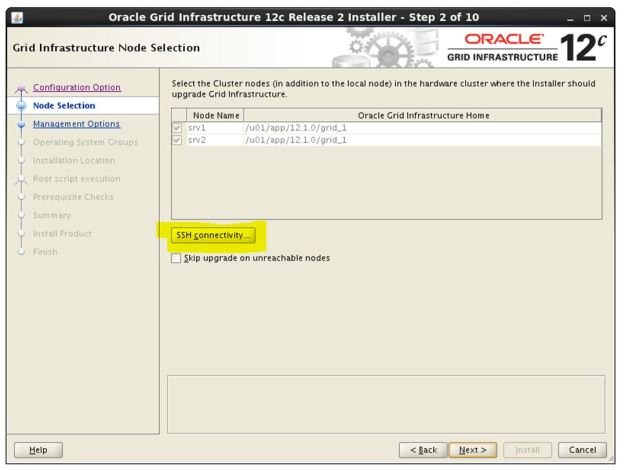

Click on SSH Connectivity button
Enter the OS grid user password.
Click on Test button. If it reports that the SSH connectivity is not configured, click on Setup button.


Make sure asmadmin and asmdba are selected.
 |
Make sure /u01/app/grid is selected.
 Mark the check box “Automatically run configuration scripts”
Enter the root password
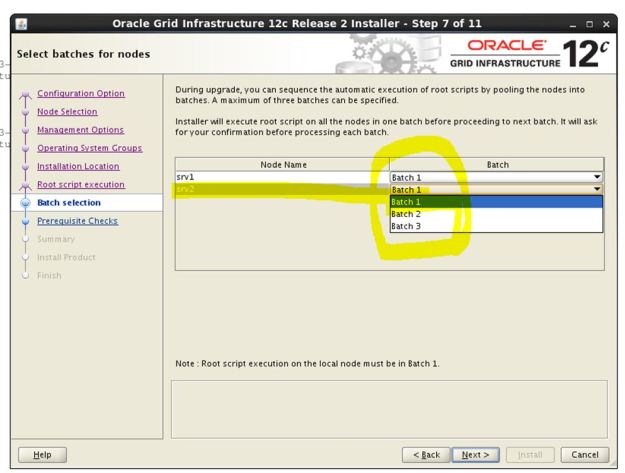
Set the upgrade on srv2 to Batch 2.
If you keep it in Batch 1, the system will not be available while the upgrade is going on.


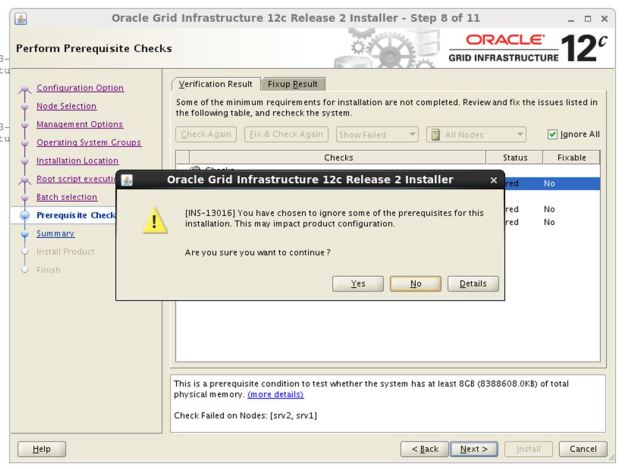
If you receive error: “cvuqdisk-1.0.10-1” being unavailable on the system, click on “Fix and Check Again” button.
The following warning can be ignored (for a production system they must be addressed):
– Memory is less than 8 GB
– resolv.conf Integrity
– (Linux)resolv.conf Integrity
Select Ignore All check box then click on Next button
Note: You could have run the Cluster Verification Utility (CVU) before running the installer. Running it from within the installer gives the same results.

click on Install button
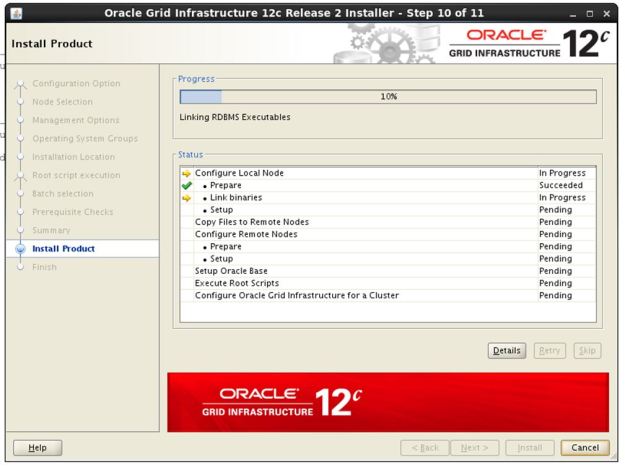


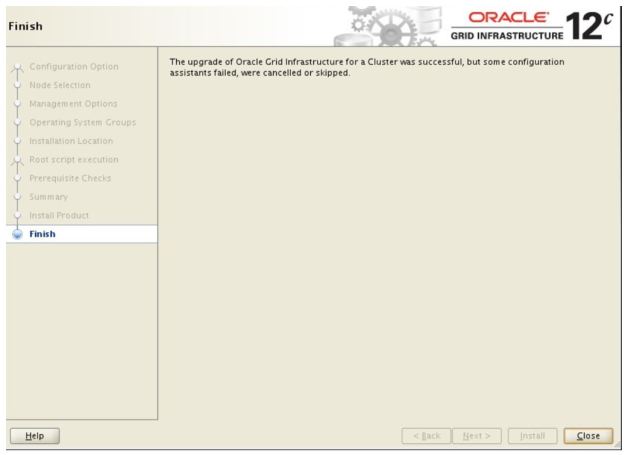
In the Putty window, verify the upgrade has been successfully concluded:
/u01/app/12.2.0/grid/bin/crsctl check cluster -all
/u01/app/12.2.0/grid/bin/crsctl query crs activeversion
