Tag Archives: oracle

CDC using Oracle XStream mode & Talend

Change data capture is an advanced technology for data replication and loading that reduces data warehousing programs’ time and resource costs and facilitates real-time data integration across the enterprise. By detecting changed records in data sources in real-time and propagating those changes to an ETL data warehouse, change data capture can sharply reduce the warehouse’s need for bulk load updating.

Why do you need to capture and move the changes in your data?

• Populating centralized databases, data marts, data warehouses, or data lakes
• Enabling machine learning, advanced analytics and AI on modern data architectures like Hadoop and Spark
• Enabling queries, reports, business intelligence or analytics without production impact
• Feeding real-time data to employee, customer or partner applications
• Keeping data from siloed databases in sync
• Reducing the impact of database maintenance, backup or testing
• Re-platforming to new database or operating systems
• Consolidating databases

How does Talend CDC work?

Talend CDC is based on a publish/subscribe model, where the publisher captures the changes in data in real-time. Then it makes it available to the subscribers which can be databases or applications. 

The Oracle Database records changes in the transaction log in commit order by assigning a System Commit Number (SCN) to every transaction.

Three different CDC modes are available in Talend Studio:

Trigger: this mode is the by-default mode used by CDC components.

Redo/Archive log: this mode is used with Oracle v11 and previous versions.

XStream: this mode is used only with Oracle v12 with OCI.

Benefits of Log-Based Change Data Capture:

Redo/Archive log: this mode is used with Oracle v11 and previous versions

XStream: this mode is used only with Oracle v12 with OCI

The biggest benefit of log-based change data capture is the asynchronous nature of CDC:

Changes are captured independent of the source application performing the changes.

• The additional performance impact on the source system is low

• CDC enables the implementation of near real-time architectures

• No significant changes to the application in the source system CDC reduces the amount of data transmitted over the network

About Oracle Xstream:

XStream consists of Oracle Database components and application programming interfaces (APIs) that enable client applications to receive data changes from an Oracle database and send data changes to an Oracle database.

These data changes can be shared between Oracle databases and other systems. The other systems include non-Oracle databases, non-RDBMS Oracle products, file systems, third party software applications,and so on. A client application is designed by the user for specific purposes and use cases.

XStream consists of two major features: XStream Out and XStream In. 

XStream Out provides Oracle Database components and APIs that enable you to share data changes made to an Oracle database with other systems. XStream Out can retrieve both data manipulation language (DML) and data definition language (DDL) changes from the redo log and send these changes to a client application that uses the APIs.

XStream In provides Oracle Database components and APIs that enable you to share data changes made to other systems with an Oracle database. XStream can apply these changes to database objects in the Oracle database

Reference:

https://help.talend.com/r/6lpaT_M~MEVrltFQcrPe4g/Ni3tTLbdYnf7GCwNT5F5rQ

http://docs.oracle.com/cd/E11882_01/server.112/e16545/toc.htm

Advertisement

Moving data from oracle to HDFS

I divided the scope into two stages:

Stage -1 | Initial data load from Oracle database to HDFS (for bulk load)

  • Here I used oracle native utility (Copy2hadoop) for reducing the friction

Stage -2 | Synchronize data from Oracle to Hadoop (delta changes)

  • Here I used SharePlex, comparatively effective third party tool (Quest/Dell) for data replication

Stage -1 | Initial data load from Oracle database to HDFS

Generally, we have two tools for data movement from the Oracle Database to HDFS

Sqoop and Copy2Hadoop :

Copy2Hadoop has advantages over sqoop, In my case we have complex query(Functions, PL/SQL, Joins) or even views (like a sub-case for complex queries). So, it is recommended to use Copy2Hadoop for the initial load. Since it is oracle native utility it will save our time and effort.

Copy2Hadoop creates datapump files that could have any Oracle datatype which is supported by Oracle External table and store data in Oracle’s datatype. When we convert datatype from Oracle format to the Java format (like sqoop does) there is always risk that some information would be converted incorrectly. Copy2Hadoop insures us from that.

Below are the high-level steps to copy the data:

Note:
Create Oracle Data Pump files from Oracle Database table data that we want to move. 
We can do this by exporting the data from the Oracle Database table using the oracle_datapump
access driver (Using Oracle Data Pump files generated by other database utilities will
not be accessible by Hive tables.  We need to use the oracle_datapump access driver to export the data.)

• Create Oracle Data Pump files and the ORACLE_DATAPUMP access driver.

• Copy the Oracle Data Pump files from source system to HDFS.

• Create Hive tables to read the Oracle Data Pump files.

What Is Copy to Hadoop?
Oracle Big Data SQL includes the Oracle Copy to Hadoop utility. This utility makes it simple to identify and copy Oracle data to the Hadoop Distributed File System. It can be accessed either through a command-line interface or via Oracle SQL Developer. Data exported to the Hadoop cluster by Copy to Hadoop is stored in Oracle Data Pump format. This format optimizes queries thru Big Data SQL:

• The data is stored as Oracle data types – eliminating data type conversions

• The data is queried directly – without requiring the overhead associated with Java SerDes

After generating Data Pump format files from the tables and copying the files to HDFS, you can use Apache Hive to query the data. Hive can process the data locally without accessing Oracle Database. When the Oracle table changes, you can refresh the copy in Hadoop. Copy to Hadoop is primarily useful for Oracle tables that are relatively static, and thus do not require frequent refreshes.

Copy to Hadoop is licensed under Oracle Big Data SQL. You must have an Oracle Big Data SQL license in order to use utility

Stage -2 | Synchronize data from Oracle to Hadoop

Using SharePlex to replicate the data in near real-time.

What is SharePlex ?

SharePlex is the complete enterprise solution for Oracle database replication, including high availability, scalability, data integration and reporting use cases.

Why SharePlex ?

• Redo Log Based Database Replication
• Read the redo log for changes
• Ship the changes from source to target in near-real time
• Requires source and target have identical data to start
• Backup/copy consistent to an SCN
• Maintain synchronization between databases

SharePlex architecture

I am very exited, my book is out for sale.

Looking for oracle RAC administration jobs?

This book will provide complete details on Oracle RAC administration interview questions and answers. This book helps you in cracking your interview & acquire your dream career as Oracle RAC Administrator. This book is a perfect companion to stand ahead above the rest in today’s competitive job market.

Sections to be discussed:
Basic to advance RAC administration interview Questions
RAC installation Questions
RAC Upgrade/Patching Questions
RAC Data Guard Configuration Questions
RAC troubleshooting Questions

390 Oracle RAC administration interview questions for getting hired as an Oracle Database RAC administration.

Soft parsing of SQL statements was consuming significant database time.

Every query needs to be parsed before it got executed. If some queries are quite frequently used, a good design will be reuse the parsed query. That means, it will not parse the same query again (provided that we are using bind variables), rather will reuse the existing parsed query and then execute it. In an ideal world, execute should be more than the parse. More parsing requires more CPU.

Ideally when execute is more than parse, the figure will be positive. The ratio goes down if there are more parses than the execute. Then some of the queries are parsed, but less or never executed!.

Causes could be one of the followings:

  • There might be no “Prepared Statement caching” in java layer or in jdbc connection pool.

Solution:

Enable Statement Caching in Java:

// Enable statement caching

((OracleConnection)connection).setStatementCacheSize(x);

((OracleConnection)connection).setImplicitCachingEnabled(true);
  • There might be the case, before the execution of a query, the cursor was closed.
  • There might not be enough “session cached cursors” to hold the queries to reuse.


Fallback if you cannot change the application(java) to use statement caching :

session_cached_cursors = X
  • There might be the case where new queries were coming to play quite frequently.
  • There might be connection interruptions, this need to be investigate from network end.

Below SQL query will help to identify, the SQL’s which is parsed but not executed or less executed:

set linesize 200;
set pagesize 1000;
col sql_text format a40;
SELECT sq.sql_text, st.executions_total, st.parse_calls_total
, round( 100*(1-( st.parse_calls_total / st.executions_total )),2) execute_to_parse
, st.executions_delta, st.parse_calls_delta
, round( 100*(1-( st.parse_calls_delta / st.executions_delta )),2) delta_ratio
FROM DBA_HIST_SQLSTAT st
, DBA_HIST_SQLTEXT sq
, DBA_HIST_SNAPSHOT s
WHERE s.snap_id = st.snap_id
AND s.begin_interval_time >= to_date('2018-10-19 01:00 pm','YYYY-MM-DD HH:MI pm')
AND s.end_interval_time <= to_date('2018-10-19 03:00 pm','YYYY-MM-DD HH:MI pm') AND st.sql_id = sq.sql_id AND st.parsing_schema_name='<schema_owner>' AND st.executions_total !=0 AND st.executions_delta !=0 ORDER BY delta_ratio;

Upgrade the Oracle RAC Grid Infrastructure from release 12.1.0.2 to release 12.2.0.1.

Upgrade Oracle Grid Infrastructure:

Note: Oracle Grid Infrastructure 12.2 has added new features that require plenty of disk space in the CRS disk group. Therefore, you must expand the size of the CRS disk group before you can upgrade Oracle Grid to the new release.

Expand the CRS disk group in ASM.
## Shut down srv1 and srv2.
## Add a new fixed-size sharable disk to srv1. Give it the name DISK4 and set its size to 40 GB.

up21.JPG
In Oracle VirtualBox, click on srv1 >> click on Settings >> click on Storage in the right pane >> click on Controller: SATA >> click on Add Hardisk >> click on Add a New Disk >> select VDI option >> make it fixed-size >> enter the full-path filename of the disk >> set its size to 40 GB

up22.JPG
## Once the disk is created, make it sharable.
File menu item >> Virtual Media Manager >> select the created disk DISK4 >> click on the Modify button >> choose the option to make this file shareable >> press Ok >> press Close
## Link the new disk to srv2.
click on srv2 >> click on Settings >> click on Storage in the right pane >> click on Controller: SATA >> click on Add Hardisk >> click on an Existing Disk button>> navigate to the new disk file and press OK

 ## Create the directory of the new Oracle Grid home. Make grid the owner of the home directory.

Start srv1 and wait for its OS to load.
## Start Putty and login to srv1 as root user. Format the added disk.
## display all the available disks:
ls -l /dev/sd*
# format the disk:
# answer "n", "p","1", default, default, "w" when prompted
fdisk /dev/sde

## Add the partitioned disk to the ASM recognized disk list.
oracleasm listdisks
oracleasm createdisk DISK4 /dev/sde1
oracleasm listdisks

Start srv2 and wait for its OS to load.
## Start Putty and login to srv2 as root user.
## Scan the ASM disks and make sure DISK4 is seen by srv2.

oracleasm scandisks
oracleasm listdisks

## Login to the VirtualBox window of srv1 as grid.

## Start asmca utility and add DISK4 to the CRS disk group.
Right-click on the CRS disk group >> select Add Disks >> select DISK4 then click on OK button
You should see the CRS disk group size increased to nearly 50GB, as shown in the following screenshot:

up20.JPG

## Make sure you have Putty sessions connected to srv1 and srv2 as root.
## Create the directory of the new Oracle Grid home. Make grid the owner of the home directory.

##srv1
mkdir -p /u01/app/12.2.0/grid
chown grid:oinstall /u01/app/12.2.0/grid

##Create the same directory in srv2.

ssh srv2
mkdir -p /u01/app/12.2.0/grid
chown grid:oinstall /u01/app/12.2.0/grid
exit

##In the VirtualBox window of srv1, login as grid user

##Unzip the linuxx64_12201_grid_home.zip file to the new Grid home directory.

unzip linuxx64_12201_grid_home.zip -d /u01/app/12.2.0/grid

##In the terminal windows, change the current directory to the new Oracle Grid directory.

cd /u01/app/12.2.0/grid
export ORACLE_HOME=/u01/app/12.2.0/grid
./gridSetup.sh
up1

up2.JPG

up3.JPG

up4


Click on SSH Connectivity button

Enter the OS grid user password.

Click on Test button. If it reports that the SSH connectivity is not configured, click on Setup button.

up5.JPG

up6.JPG

up7


Make sure asmadmin and asmdba are selected.

up8

Make sure /u01/app/grid is selected.

up9
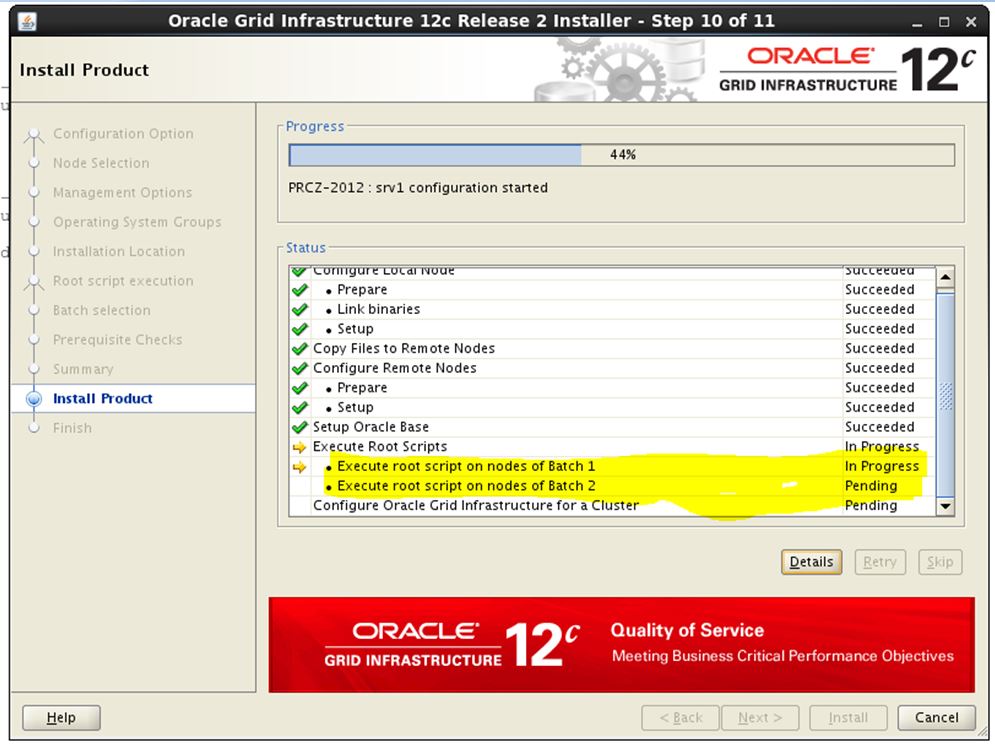
Mark the check box “Automatically run configuration scripts

Enter the root password

up10

Set the upgrade on srv2 to Batch 2.

If you keep it in Batch 1, the system will not be available while the upgrade is going on.

up11

up12

up13.JPG

If you receive error: “cvuqdisk-1.0.10-1” being unavailable on the system, click on “Fix and Check Again” button.

The following warning can be ignored (for a production system they must be addressed):

– Memory is less than 8 GB

– resolv.conf Integrity

– (Linux)resolv.conf Integrity

Select Ignore All check box then click on Next button

Note: You could have run the Cluster Verification Utility (CVU) before running the installer. Running it from within the installer gives the same results.

up14.JPG

up15.JPG

click on Install button

up16.JPG

up17.JPG

up18.JPG

up19.JPG

In the Putty window, verify the upgrade has been successfully concluded:

/u01/app/12.2.0/grid/bin/crsctl check cluster -all
/u01/app/12.2.0/grid/bin/crsctl query crs activeversion

How to Audit User Activity in Oracle Database

Step 1.

SQL> alter system set audit_trail=db scope=spfile;
System altered.

SQL> alter system set audit_sys_operations=true scope=spfile;

Step 2. stop Database

Step 3. start database.

Step 4. check parameter
SQL> show parameter audit_
NAME TYPE VALUE
———————————— ———– ——————————
audit_file_dest string /u01/db/product/10.2.0/rdbms/audit
audit_sys_operations boolean TRUE
audit_syslog_level string
audit_trail string DB

Step 5. Log in as sysdba.

SQL> audit all by apps by access;

OR
Give the audit permission for delete and drop objects.

SQL> audit DELETE ANY TABLE,DROP ANY INDEX,DROP ANY PROCEDURE,DROP ANY TABLE,DROP ANY VIEW,ALTER ANY PROCEDURE,ALTER ANY INDEX by apps
by access whenever successful;

Step 7. Check the operation (log in as sysdba);

SQL> SELECT username, extended_timestamp, owner,obj_name ,action_name FROM dba_audit_trail WHERE owner = ‘APPS’ and extended_timestamp=sysdate -1 ORDER BY timestamp;

SQL> SELECT count(1) FROM dba_audit_trail WHERE owner = ‘APPS’ and extended_timestamp=sysdate -1 ORDER BY timestamp;

SQL> SELECT count(1) FROM dba_audit_trail WHERE owner = ‘APPS’ and extended_timestamp=sysdate – 1

SELECT count(1) FROM dba_audit_trail WHERE owner = ‘APPS’ ORDER BY timestamp;

Step 8. Check how many no of record in audit tables;
select count(1) from sys.aud$;

Some basic education on how to read an oracle error stack

The errors are given in descending order – the top most error is typically the application error. The errors beneath it go into more and more technical/explicit detail of what went wrong, usually down to the operating system level.

Thus the cause of the (application) exception at the top of the error stack is the (system) exception at the bottom of the stack. If we only look at the top and bottom errors, then:

ORA-00204: error in reading (block 3, # blocks 8) of control file

Oracle error, saying that it failed attempting to read a file. Why? The bottom error says:

O/S-Error: (OS 23) Data error (cyclic redundancy check).

O/S error obviously means that this is from the operating system. It tried to perform the file I/O requested by Oracle (application layer) and it failed. It reports a CRC data error on the file.

So is this an Oracle problem? No, the root error is from the o/s and it reports a CRC error on a file.

So should you have even asked for assistance here? Or should your first stop not have been going on google (or bling/yahoo/whatever) and searching “+windows+” (the o/s in question) and “+cyclic redundancy check+” (the error reported by the o/s)? Perhaps even throw “+ntfs+” into the search too (assuming that this is the file system being used).

One of the most important skills for a software engineer is the ability to solve problems – not technical details (like what is a CRC error?). The technical stuff you can look up in the reference docs and material. But if you do not try to understand a simple error stack and analyse the problem, you will never acquire the skill to solve problems. And always be reliant on the skills of others to spoonfeed you and tell you what the problem is.

CLONE ORACLE DATABASE WITH COLD BACKUP:

1. Identify and copy the database files

With the source database started, identify all of the database’s files. The following query will display all datafiles, tempfiles and redo logs:

set lines 100 pages 999

col name format a50

select name, bytes

from (select name, bytes

from v$datafile

union all

select name, bytes

from v$tempfile

union all

select lf.member “name”, l.bytes

from v$logfile lf

, v$log l

where lf.group# = l.group#) used

, (select sum(bytes) as poo

from dba_free_space) free

/

OR

SQL>Select name from v$datafile;

SQL>Select member from v$logfile;

Make sure that the clone databases file-system is large enough and has all necessary directories.

If the source database has a complex file structure, you might want to consider modifying the

above sql to produce a file copy script.

Stop the source database with:

shutdown immediate

Copy, scp or ftp the files from the source database/machine to the target.

Do not copy the control files across. Make sure that the files have the correct permissions and ownership.

Start the source database up again

startup

2. Produce a pfile for the new database

This step assumes that you are using a spfile. If you are not, just copy the existing pfile.

From sqlplus:

create pfile=’init.ora’ from spfile;

This will create a new pfile in the $ORACLE_HOME/dbs directory.

Once created, the new pfile will need to be edited. If the cloned database is to have a new name,

this will need to be changed, as will any paths. Review the contents of the file and make

alterations as necessary.

Also think about adjusting memory parameters. If you are cloning a production database onto

a slower development machine you might want to consider reducing some values.

Now open the parameter file in clone database and change the following parameters with the respective current location.

CONTROL FILES

BACKGROUND_DUMP_DEST

USER_DUMP_DEST

CORE_DUMP_DEST

LOG_ARCHIVE_DEST_1

And Place the BST4 pfile on /$ORACLE_HOME/dbs

Note. Pay particular attention to the control locations.

3. Create the clone controlfile

Create a control file for the new database. To do this, connect to the source database and request a dump of the current control file. From sqlplus:

alter database backup controlfile to trace as ‘/home/oracle/cr_.sql’

/

4. Edit the file

FROM: CREATE CONTROLFILE REUSE DATABASE “BST2” RESETLOGS …

TO: CREATE CONTROLFILE set DATABASE “BST4” RESETLOGS …

Change the word ‘REUSE’ to ‘set’ and the ‘BST2’ to ‘BST4′. Also change the datafiles location parameter to BST4 database location.

CONTROL FILES

BACKGROUND_DUMP_DEST

USER_DUMP_DEST

CORE_DUMP_DEST

LOG_ARCHIVE_DEST_1

And Place the BST4 pfile on /DV1_u31/oraBST2/db/tech_st/10.2.0/dbs

5. In clone database SERVER export ORACLE_SID environment variable and start the instance

$export ORACLE_SID=bst4

$sqlplus

Enter User:/ as sysdba

SQL> startup nomount pfile=’initBST4.ora’;

6. Run create controlfile script to create the controlfile

SQL>@createcontrolfile.sql

Trouble shoot:

It is quite common to run into problems at this stage. Here are a couple of common errors and solutions:

ORA-01113: file 1 needs media recoveryYou probably forgot to stop the source database before copying the files.

Go back to step 1 and recopy the files.

ORA-01503: CREATE CONTROLFILE failed

ORA-00200: controlfile could not be created

ORA-00202: controlfile: ‘/u03/oradata/dg9a/control01.ctl’

ORA-27038: skgfrcre: file exists

Double check the pfile created in step 2. Make sure the control_files setting

is pointing at the correct location. If the control_file setting is ok, make sure that the control

files were not copied with the rest of the database files. If they were, delete or rename them.

7. Open the database

SQL>alter database open;

8. Perform a few checks

If the last step went smoothly, the database should be open.

It is advisable to perform a few checks at this point:

Check that the database has opened with:

select status from v$instance;

The status should be ‘OPEN’

Make sure that the datafiles are all ok:

select distinct status from v$datafile;

It should return only ONLINE and SYSTEM.

Take a quick look at the alert log too.

9. Set the databases global name

The new database will still have the source databases global name. Run the following to reset it:

alter database rename global_name to

/

10. Create a spfile

From sqlplus:

create spfile from pfile;

11. Change the database ID

If RMAN is going to be used to back-up the database, the database ID must be changed.

If RMAN isn’t going to be used, there is no harm in changing the ID anyway – and it’s a good practice to do so.

From sqlplus:

shutdown immediate

startup mount

exit

From unix:

nid target=/

NID will ask if you want to change the ID. Respond with ‘Y’. Once it has finished, start the database up again in sqlplus:

shutdown immediate

startup mount

alter database open resetlogs

/

12. Configure TNS

Add entries for new database in the listener.ora and tnsnames.ora as necessary.

13. Finished

That’s it!

How to switch the database to a new UNDO tablespace and drop the old one

STEP -1
=======

$ sqlplus / as sysdba

SQL> show parameter undo

NAME                                 TYPE        VALUE
———————————— ———– ——————————
undo_management                      string      AUTO
undo_retention                       integer     900
undo_tablespace                      string      UNDOTBS1
SQL>

The current undo tablespace as suggested by the initialization parameter undo_tablespace is UNDOTBS1.
Leave this sysdba as is, open another console, log in as user SCOTT and initiate a transaction.

STEP -2
=======

— Create a new undo tablespace

CREATE UNDO TABLESPACE undotbs2
DATAFILE ‘/d01/apps/oradata/oraxpo/undotbs201.dbf’
SIZE 50M AUTOEXTEND ON NEXT 5M;

Tablespace created.

STEP -3
=======

— Switch the database to the new UNDO tablespace.

ALTER SYSTEM SET UNDO_TABLESPACE=UNDOTBS2 SCOPE=BOTH;

System altered.

STEP -4
=======

— Try to drop the tablespace but failed.

SQL> DROP TABLESPACE undotbs1 INCLUDING CONTENTS AND DATAFILES;
DROP TABLESPACE undotbs1 INCLUDING CONTENTS AND DATAFILES
*
ERROR at line 1:
ORA-30013: undo tablespace ‘UNDOTBS1’ is currently in use

With the alter system set undo_tablespace=UNDOTBS2, the database UNDO tablespace is changed and any
new transaction’s undo data will go to the new tablespace i.e. UNDOTBS2.
But the undo data for already pending transaction (e.g. the one initiated by SCOTT before the database
UNDO tablespace switch) is still in the old tablespace with a status of PENDING OFFLINE. As far as it
is there you cannot drop the old tablespace.

STEP -5
=======

— The query shows the name of the UNDO segment in the UNDOTBS1 tablespace and its status.
Now lets see which users/sessions are running this pending transaction.

set lines 10000
column name format a10

SELECT a.name,b.status
FROM   v$rollname a,v$rollstat b
WHERE  a.usn = b.usn
AND    a.name IN (
SELECT segment_name
FROM dba_segments
WHERE tablespace_name = ‘UNDOTBS1’
);

NAME       STATUS
———- —————
_SYSSMU8$  PENDING OFFLINE

column username format a6

SELECT a.name,b.status , d.username , d.sid , d.serial#
FROM   v$rollname a,v$rollstat b, v$transaction c , v$session d
WHERE  a.usn = b.usn
AND    a.usn = c.xidusn
AND    c.ses_addr = d.saddr
AND    a.name IN (
SELECT segment_name
FROM dba_segments
WHERE tablespace_name = ‘UNDOTBS1’
);

NAME       STATUS          USERNA        SID    SERIAL#
———- ————— —— ———- ———-
_SYSSMU8$  PENDING OFFLINE SCOTT         147          4

So this is SCOTT with SID=147 and SERIAL#=4. Since we know now the user, we can go to him/her and
request to end the transaction gracefully i.e. issue a ROLLBACK or COMMIT. However,
if this is not possible (say the user initiated the transaction and left for annual leave 🙂
and trust me this happens) you may go ahead and kill the session to release the undo
segments in the UNDOTBS1 tablespace.

SQL> alter system kill session ‘147,4’;

System altered.

SELECT a.name,b.status , d.username , d.sid , d.serial#
FROM   v$rollname a,v$rollstat b, v$transaction c , v$session d
WHERE  a.usn = b.usn
AND    a.usn = c.xidusn
AND    c.ses_addr = d.saddr
AND    a.name IN (
SELECT segment_name
FROM dba_segments
WHERE tablespace_name = ‘UNDOTBS1’
);

no rows selected

As we can see once the session is kills we don’t see anymore segments occupied in the UNDOTBS1 tablespace.
Lets drop UNDOTBS1.

SQL> DROP TABLESPACE undotbs1 INCLUDING CONTENTS AND DATAFILES;
DROP TABLESPACE undotbs1 INCLUDING CONTENTS AND DATAFILES
*
ERROR at line 1:
ORA-30013: undo tablespace ‘UNDOTBS1’ is currently in use

If you are retaining undo data then you still won’t be able to drop the tablespace because it is still in use by undo_retention.
Let the UNDO_RETENTION time pass and then try to drop the tablespace. In my case it is 900 seconds i.e. 15 minutes.

— After 15 minutes.

SQL> DROP TABLESPACE undotbs1 INCLUDING CONTENTS AND DATAFILES;

Tablespace dropped.